This guide will show you how to create a staging/development website using Installatron.
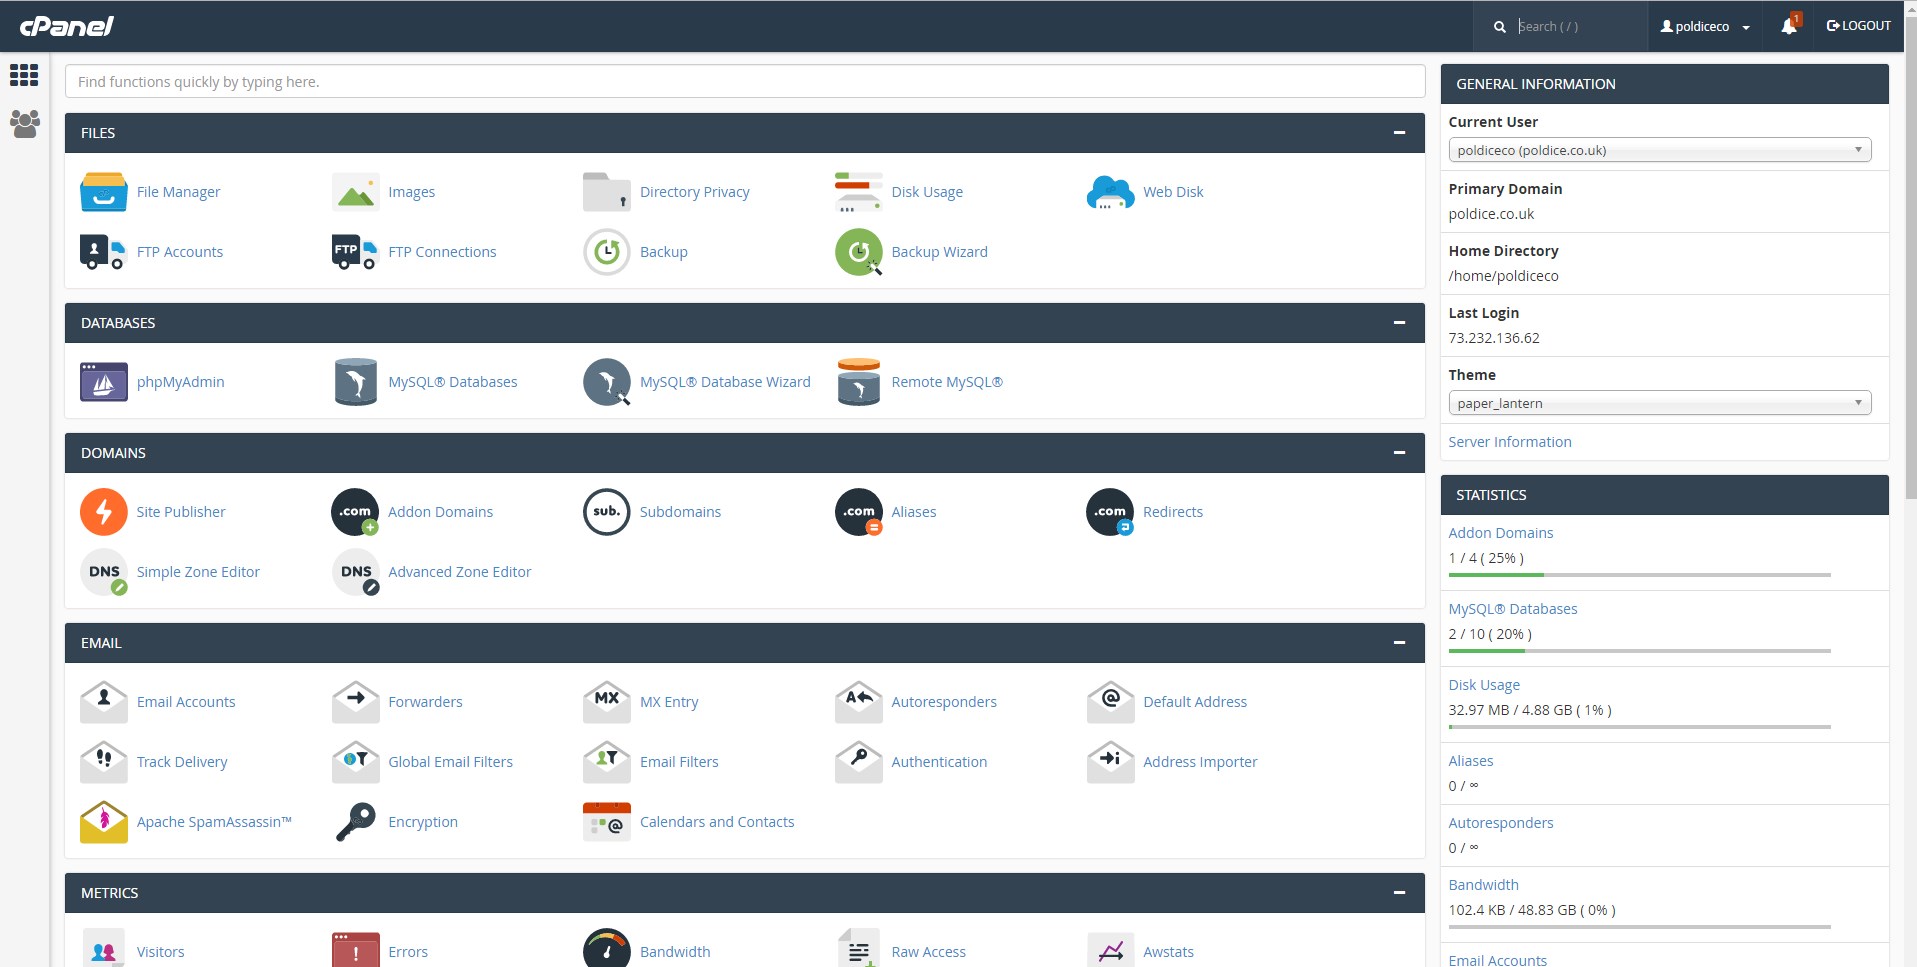
- Login to your cPanel account. When you first set up an account with us, you would have received an email with the details on how you can gain access to your control panel. If you have lost those details, feel free to raise a support ticket or call in.
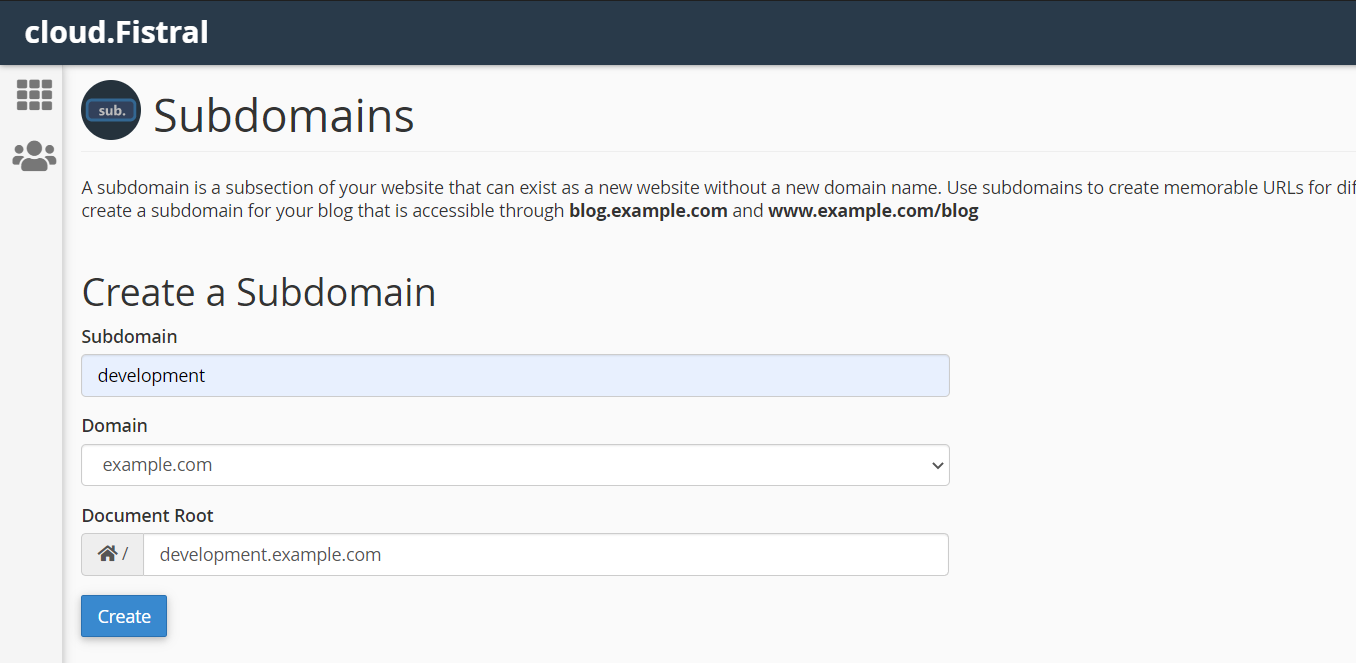
2. Create a subdomain via cPanel > Domains > Create A New Domain. The subdomain can be called whatever you like, although it's recommended to use a descriptive subdomain e.g. staging.example.com, dev.example.com etc. or something that is specific to the project e.g. Joesnewblog.example.com etc.
Note: DNS can affect whether or not a subdomain can be used to create a staging site. If your domain is using our Nameservers for example;
- ns1.cloudabove.com
- ns2.cloudabove.com
or;
- ns1.hostsvr.net
- ns2.hostsvr.net
You can create a new subdomain as shown above and it will work straight away, however if your domain is using the Nameservers of another provider e.g. GoDaddy, 123-Reg, IONOS (1&1) etc. you will need to create a new A record for the subdomain in the providers control panel, that points to the appropriate IP address of your hosting account with us. You can use the IntoDNS tool (https://intodns.com/) to check the Nameservers used by your domain, and the IP address for your hosting account with us can be found to the left of your cPanel account, under Shared IP Address, when you first login.
If you don't have access to create the A record for the subdomain, you will need to take an alternative approach by creating a creating a sub directory. See the following guide for creating a sub directory:
https://support.cloudabove.com/articles/getting-st...
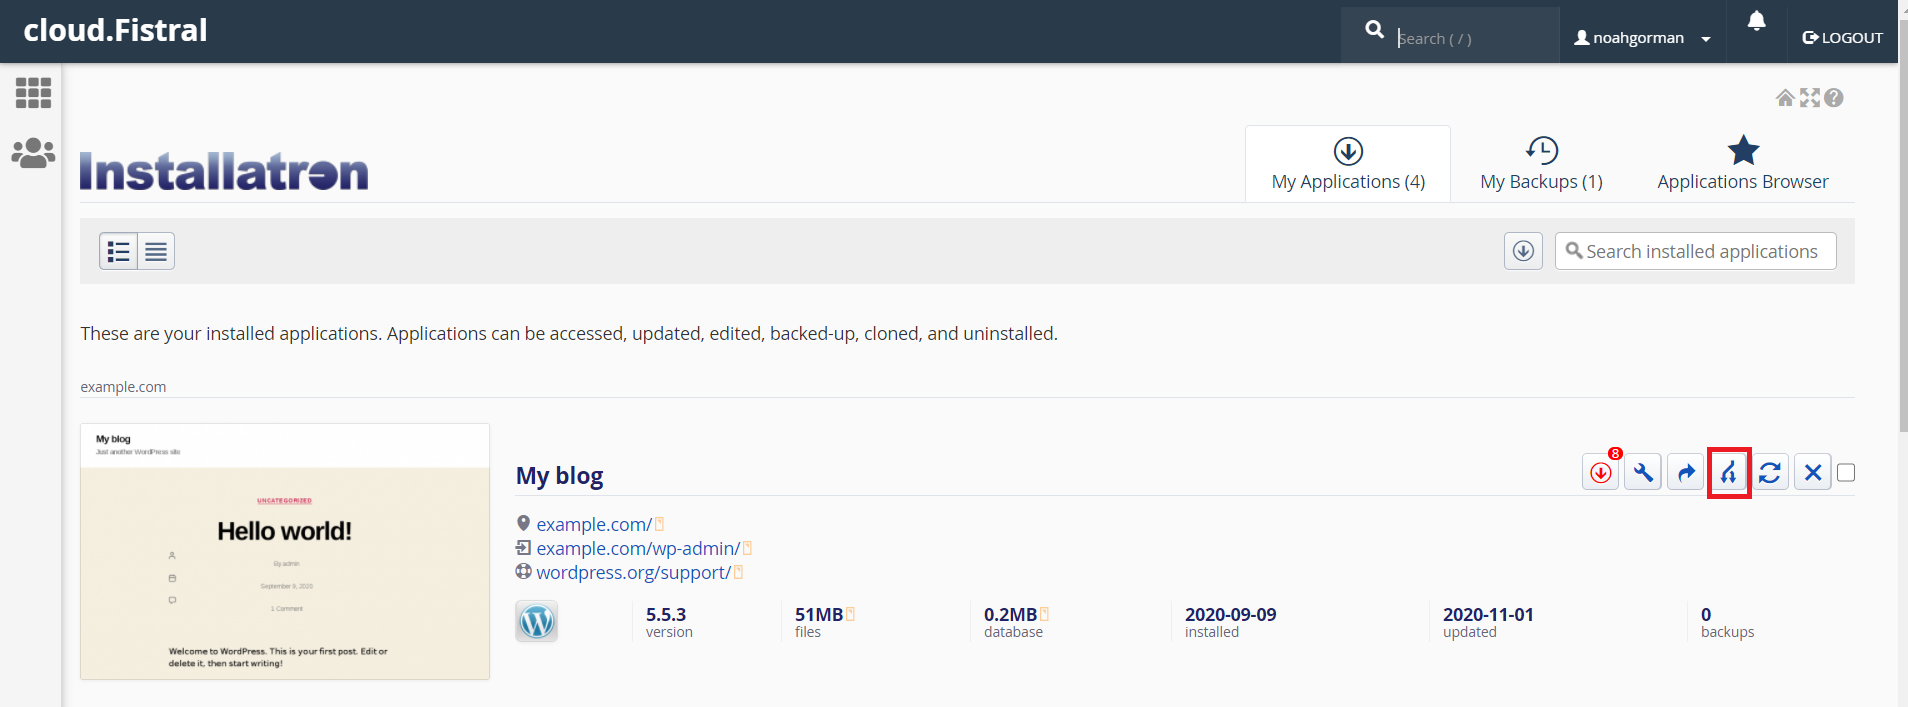
3. Now that you have created a subdomain, you need to clone the live website to the new subdomain. First, go to cPanel > Installatron.

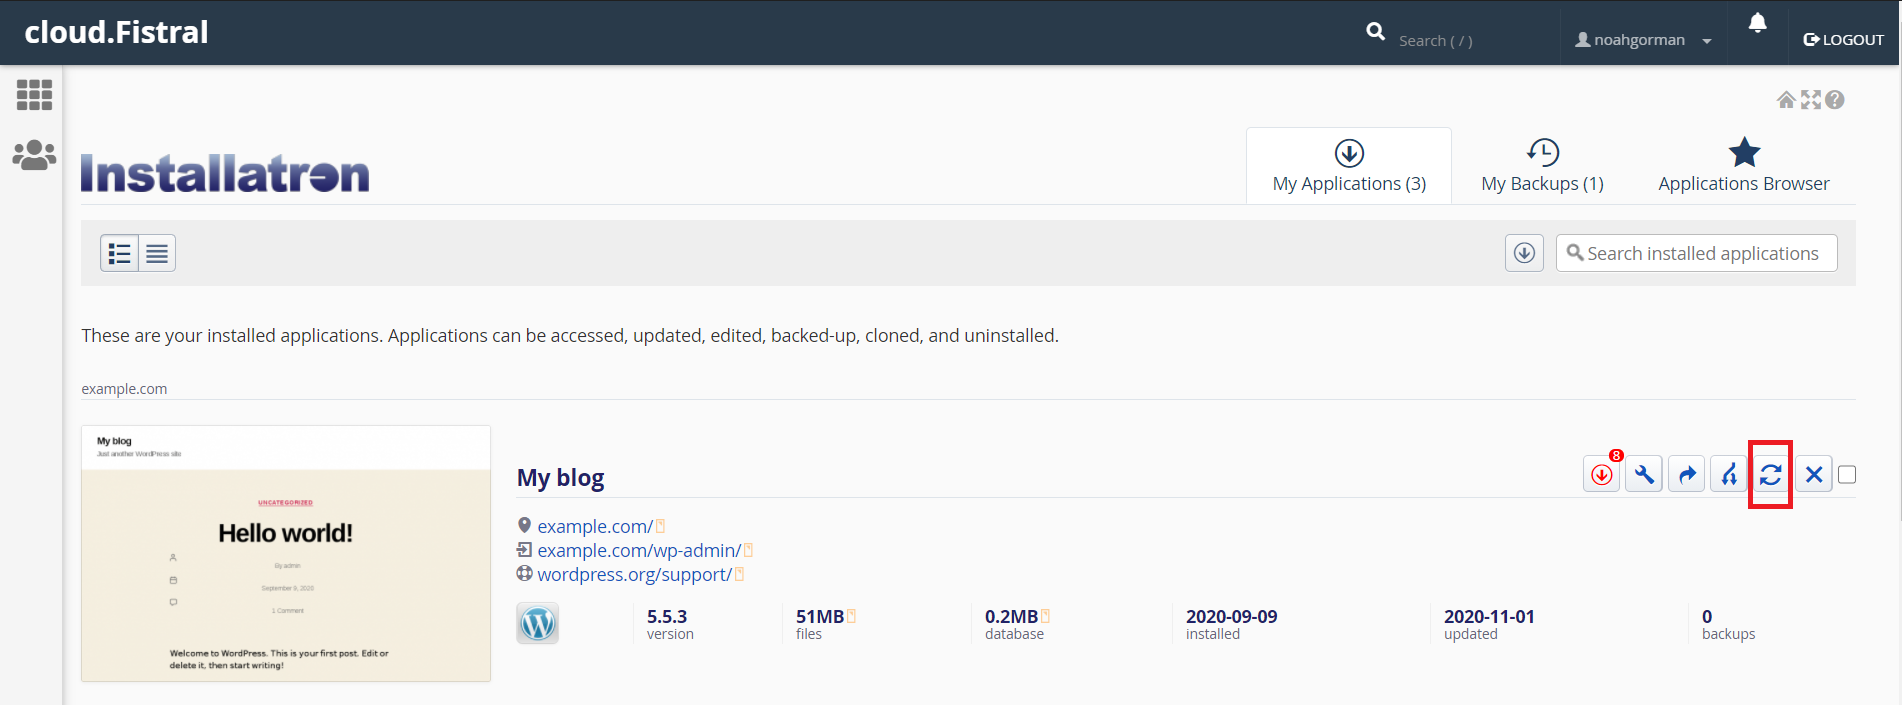
4. Under My Applications find and select the website that you wish to clone, then click on the "Clone" button located on the right side of the page.
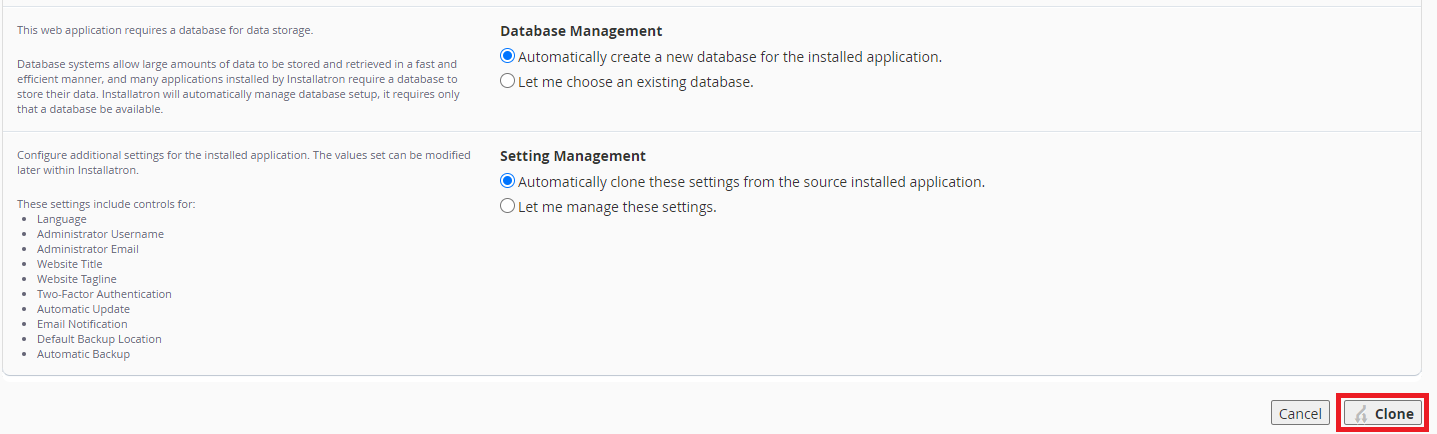
5. Select the subdomain that you have created in step 2, from the drop down list at the top. Also remember to check the Create a Staging site? option, the rest of the settings are optional and can be left as they are.
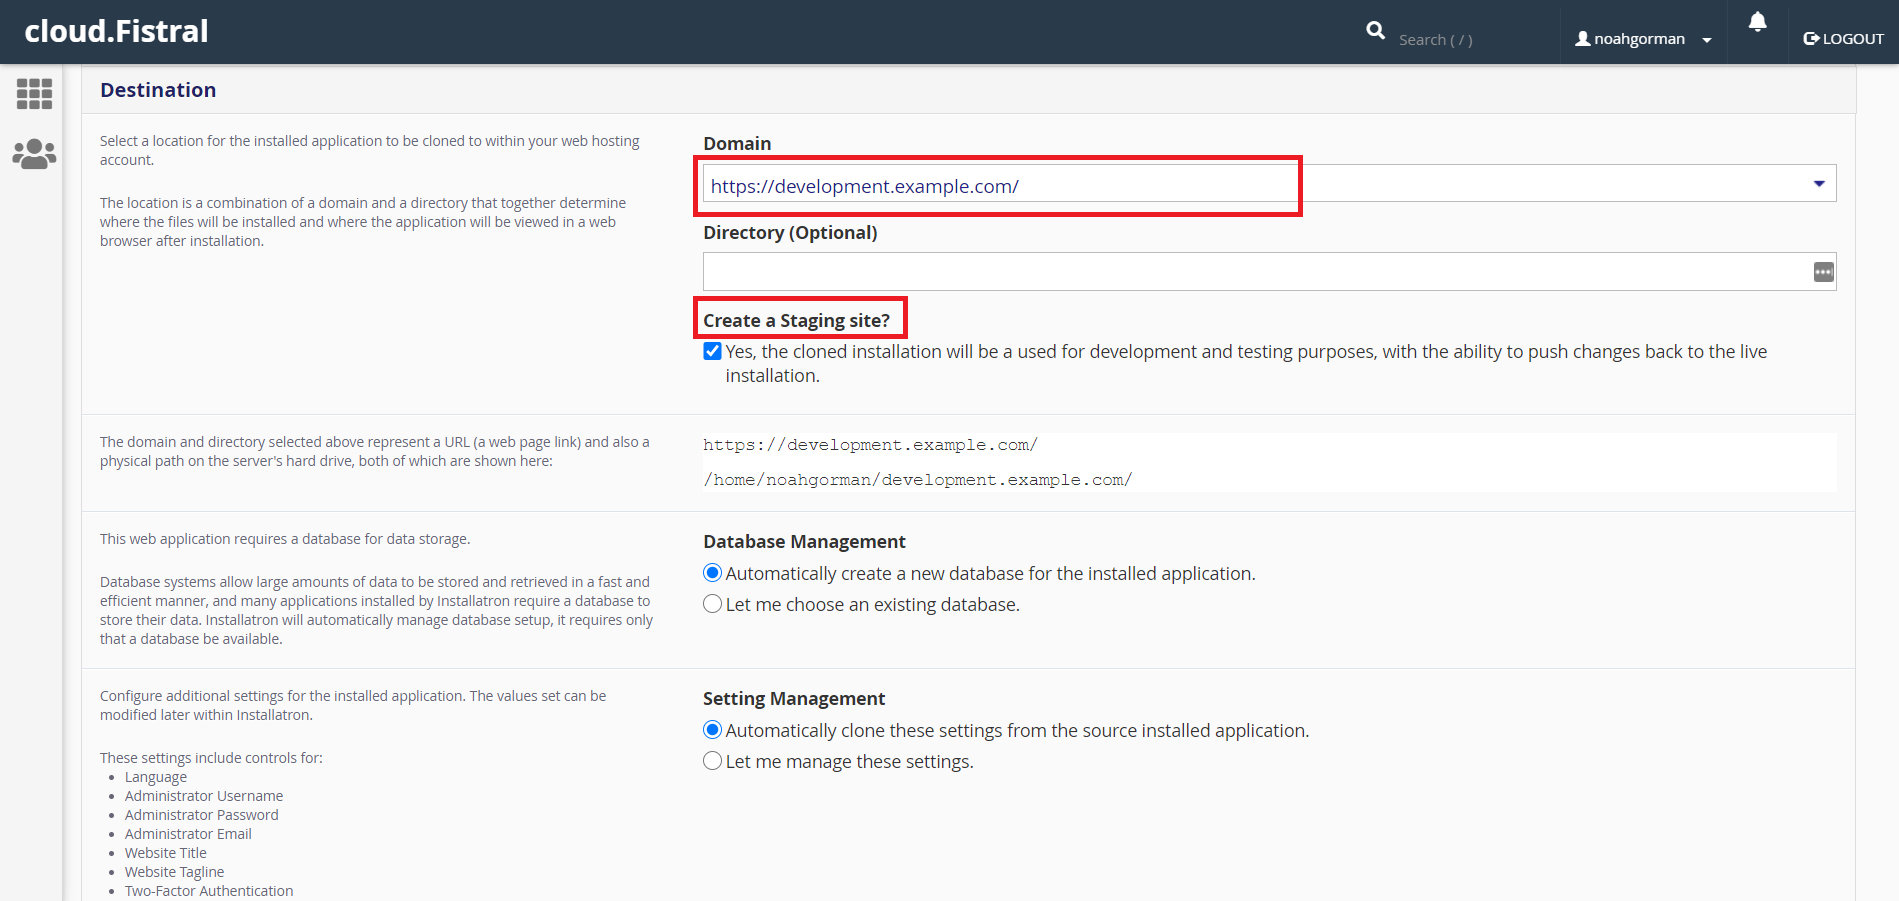
Note: The Directory option may sometimes be pre-filled with "blog", make sure that the Directory option is blank otherwise the clone will be installed in a sub directory on the subdomain i.e. instead of the new staging site being development.example.com, it would end up at development.example.com/blog.
6. Click the "Clone" button at the bottom of the page, and Installatron will create a clone of your website and place it under your new subdomain.
Note: Unless you chose to use different settings for your cloned website in step 5, all of your settings will be the same as the website that you cloned. i.e. in this guide we cloned example.com into development.example.com, so development.example.com will have retained the same settings as example.com.
7. Now you've created your staging site, you can sync any changes from the staging site to the live site by clicking the sync button, on the live site in Installatron.
8. Finally, make sure that you select the staging site subdomain from the drop down list at the top, and click Sync at the bottom of the page.
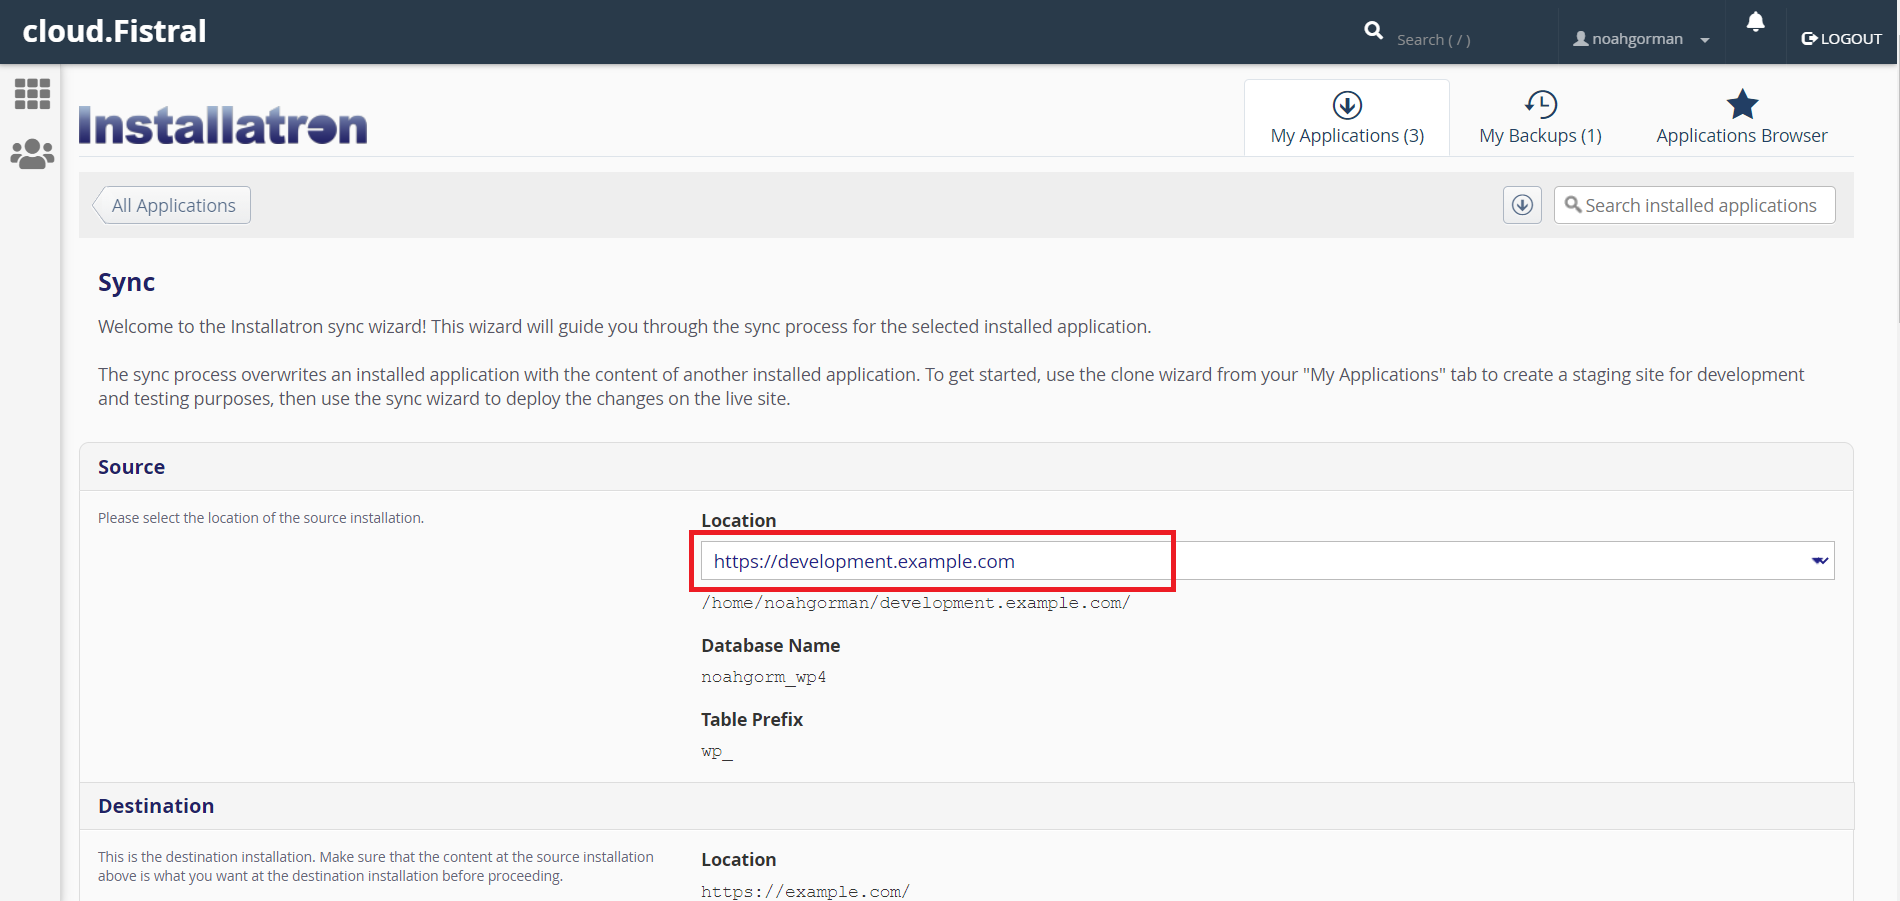
Note: You can configure which files and database tables are overwritten by the sync, however we recommend that you leave the settings as default. You also have the option to let Installatron create a backup before it runs the sync, we take regular backups on your behalf so Installatron's backup isn't necessary, however feel free to make use of it if you would prefer. The Sync can also be used to sync changes made on the live site to the staging site, however please bear in mind that syncing changes will overwrite the destination website, e.g. syncing from live to staging will overwrite the staging site and vice versa.
And that's it, you've successfully created a staging site for your website, with the ability to sync changes between the live and staging sites.
Having trouble? Feel free to get in touch either via email at support@cloudabove.com or over the phone on +44 (01872) 672 050, and we'll be happy to help.